Do you love writing? Do you love stories and storytelling and find pleasure in doing the work, writing your stories, creating your characters? Â Sometimes I let it become nothing but work, just another thing on my to-do list. I forget sometimes to reconnect with the pure pleasure and fun of making things up.
This fabulous episode of the even more wonderful Magic Lessons podcast from Elizabeth Gilbert is about the fun of making things just to be doing it. Â It's a great reminder and listening to these wonderful women talking about creating for no one but yourself is a beautiful thing.
I love that word, "traveler." Â It's right up there with "adventure" and "wild" for me, favorite exciting words that make me want to jump up and do something. Â And of course I love notebooks. Â I'm pretty sure that's come up before. Â So last week when I got a glimpse into the world of the Midori Traveler Notebook, I was hooked. Â Sort of. Â I didn't like the sizes. Â I don't want to have to send away for inserts all the time, and I don't want to have to make my own all the time.
I decided I would just make my own Midori Traveler (also called "fauxdori" which is so cute!) in a size that works for me. Â I spent hours on Pinterest, Etsy, and YouTube (favorite links below) looking at examples and watching how other people made theirs. Â I came up with a plan, picking my favorite parts from everything I looked at, and I got started.
Raw Materials
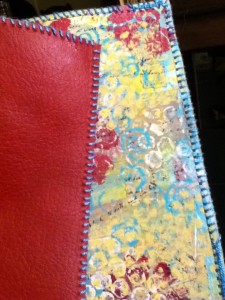
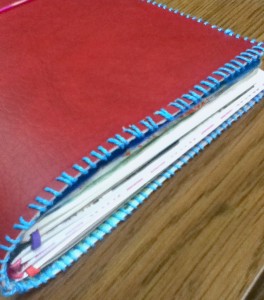
I decided on red vinyl for the cover because I didn't feel like waiting until I could get to the leather store.  I was going to line the vinyl with fabric, but I found this fabulous stuff called Kraft-tex Kraft Paper Fabric.  It acts like fabric and paper--its wonderful.  I picked some up to paint and collage for my liner.  I got turquoise embroidery floss to finish the edges to make sure there's no peeling of the layers, and I got rainbow elastic because I needed elastic, so why not rainbow?
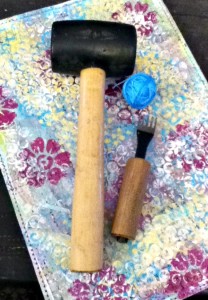
I painted and collaged the liner then glued it to the vinyl. Â Then I used a five-pronged leather punch to make holes for the embroidery floss all around the edges of the notebook.
Stitching ToolsInside and Out. Covers glued and stitched.
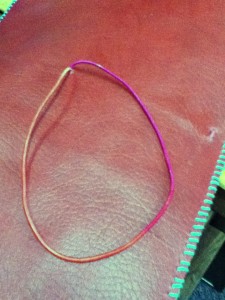
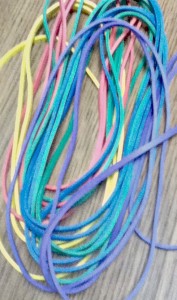
I added the rainbow elastic, mostly the magenta and flame orange section (because it's one five-yard piece of elastic, so I picked a section). Â I decided to put the holes side-by-side rather than one above the other (which is how it's set up in the real Midoris) to give me two same-sized bands on the inside.
Rainbow Elastic
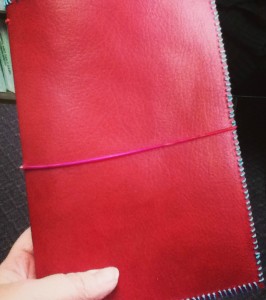
Then I added the elastic "belt". Â In the real Midoris the hole for this is in the middle of the back cover. Â I saw a few people putting theirs on the spine, so I did that with mine, too. Â So far so good, although I just finished the notebook about an hour ago so it may be too soon to tell.
Elastic BeltClosed
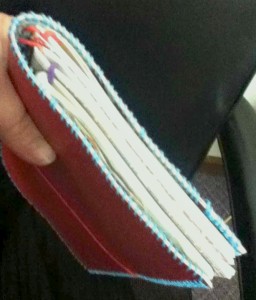
I gathered or created my filler books.  The first one is a Moleskine Cahier that I worked a few pages in several years ago then let languish.  I decided I should go ahead and use it, so I changed the title on the cover and put it into my fauxdori.  It's going to be for project plans and notes.  The next one is a greeting card that I added some decorations to and then filled with scrapbook paper to make a sort of Smash Book for visual journaling and glue-booking. The third is dot-grid printed paper bound into pretty scrapbook paper.  This one will be for writing practice, notes, etc.  And the last one is a blank book that came inside an art journaling book I got several years ago (and can't find in my house to tell you the name of).  I cut it down a bit so it will fit into my notebook.  The journals that I bound are half-sheet size (US 8.5 x 11 inches) while the Moleskine is slightly smaller, but I don't mind the disparity in size.  They are all close enough that they work fine together, and I like the idea of making my book a size that lets me pick up refills when I want instead of always having to make them.
Fillers
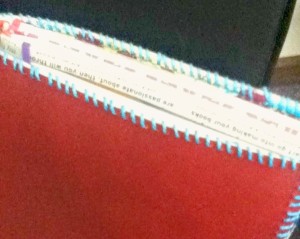
Here's the filled book:
Top Edge
Bottom Edge
I used the elastic to insert the middle books and then large rubber bands to attach each of the outside books.
7" Rubber Bands
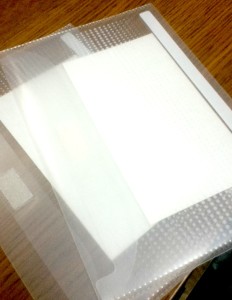
Last but not least, I added Post-it pockets inside the front and back covers to hold all the little notes and scraps of paper that accumulate.
Post-it Pockets
And now it's ready to use for creative planning, note taking, writing practice, vision collages, and whatever else I think up, all in one place!
Do you have a Midori Notebook story? Â I'd love to hear how you use yours. Â And if you have pictures, please link in the comments so we can all enjoy them. Â Thanks!
Links:
My Notebooks board on Pinterest (not all Midori, but there are a lot there)
A fantastic video on how the notebook works, how it all goes together, everything, from TheResetGirl. I think this is where I found the instructions on how to attach more notebooks with big rubber bands
There's a ton of stuff out there. Â I still have loads of videos saved to watch later, and every time I open Pinterest there are new posts. Â So go browse around, see all the cool stuff, and maybe make a Traveler of your own. Â Have fun!